Unlock the Magic: How to Make Easy Apple Scrap Vinegar from Kitchen Waste
Imagine transforming something you’d normally discard into a valuable, versatile product for your home. Sounds too good to be true? Welcome to the wonderful world of apple scrap vinegar! While it might not be a "free lunch," it's certainly one of the closest things you'll get to a zero-waste win in the kitchen. For homesteaders and savvy home cooks alike, learning how to make apple cider vinegar (or rather, its equally useful cousin, apple scrap vinegar) from simple kitchen waste is a game-changer. It's incredibly easy, surprisingly rewarding, and unlocks a natural, economical solution for everything from cleaning to cooking.
This article will guide you through the process of turning apple peels and cores into a fantastic homemade vinegar. We'll clarify what makes it different from traditional apple cider vinegar, delve into the simple science of fermentation, and provide a foolproof recipe along with essential tips to ensure your success. Get ready to impress yourself with this thrifty, eco-friendly creation!
Apple Scrap Vinegar: Understanding the Delicious Difference
Before we dive into the "how-to," it's important to set the record straight: the homemade vinegar we're discussing today, made from apple peels and cores, is technically an
apple scrap vinegar, not a true *apple cider vinegar*. While both are fermented apple products, their origins and acidity levels differ significantly.
True Apple Cider Vinegar (ACV) is crafted by first pressing apples into cider, which is then fermented into alcohol, and finally, into acetic acid. This traditional process yields a product with a higher acidity level, typically around 5-6%, making it suitable for tasks like canning and long-term food preservation. It’s also often heralded for its potent probiotic "mother" and extensive health benefits.
Apple Scrap Vinegar, on the other hand, is made by fermenting the leftover peels, cores, and sometimes bruised pieces of apples with water and sugar. This method is incredibly resource-efficient, allowing you to utilize parts of the apple that would otherwise go to waste after making applesauce, pies, or dried apple slices. The resulting vinegar is less acidic than traditional ACV, usually falling into the 3-4% range. This lower acidity means it is
NOT recommended for canning or preserving foods where precise pH levels are crucial for safety. However, don't let that deter you! Apple scrap vinegar is still an incredibly useful and flavorful product, perfect for a myriad of other household applications. To delve deeper into these distinctions, check out our detailed guide on
Real Apple Cider Vinegar vs. Scrap: Know the Difference.
The Simple Science Behind Homemade Vinegar
At its heart, making apple scrap vinegar is an act of fermentation – a natural process driven by microscopic organisms. It’s the same magic that gives us sourdough bread, sauerkraut, and kombucha! Here’s the simplified breakdown:
1.
Yeast Action: Apple scraps naturally host wild yeasts on their skins. When these scraps are submerged in water with added sugar, the yeasts get to work. They consume the sugar and convert it into alcohol. This is the first stage of fermentation.
2.
Bacterial Conversion: Once a sufficient amount of alcohol is present, another group of microbes, called acetic acid bacteria (often visible as the "mother of vinegar"), take over. These bacteria thrive in oxygen-rich environments and convert the alcohol into acetic acid – the very component that gives vinegar its characteristic sour taste and preserving properties.
The "mother" – a cloudy, gelatinous mass often seen floating in raw, unfiltered vinegars – is a colony of these beneficial bacteria and yeasts. It’s a sign of a healthy, active fermentation and can be used to kickstart future batches of vinegar. Understanding this basic process makes troubleshooting easier and empowers you to become a confident home fermenter.
Step-by-Step Guide: Making Your Own Apple Scrap Vinegar
Ready to turn your kitchen waste into liquid gold? Here’s a simple, actionable guide on how to make apple scrap vinegar at home:
What You'll Need:
- Apple Scraps: Approximately 2 cups of peels and cores from organic or unsprayed apples (non-organic are fine too, but wash them well). Ensure they are fresh and free from mold.
- Filtered Water: About 3-4 cups (enough to cover the scraps).
- Sugar: 1/4 cup (white granulated sugar is commonly used; brown sugar can work but might impart a different flavor). This sugar is vital food for the microbes, not just for sweetness.
- Large Glass Jar: A wide-mouth quart-sized or half-gallon Mason jar works perfectly.
- Breathable Cover: Cheesecloth, coffee filter, or a thin kitchen towel, secured with a rubber band.
The Process:
- Clean Your Tools: Start with impeccably clean hands, jars, and utensils. This minimizes the risk of introducing unwanted bacteria that could spoil your batch.
- Combine Ingredients: Place your apple scraps into the clean glass jar. Add the sugar, then pour in enough filtered water to completely submerge all the apple pieces. If any scraps float, you can use a small fermentation weight or a clean, non-metallic object (like a smaller glass jar or a piece of plastic wrap) to keep them submerged, preventing mold.
- Cover and Ferment: Secure the breathable cover over the mouth of the jar with a rubber band. This allows air to circulate (essential for acetic acid bacteria) while keeping fruit flies and dust out.
- Find a Spot: Place the jar in a warm, dark spot in your kitchen (ideally between 65-80°F or 18-27°C). Avoid direct sunlight, which can inhibit fermentation.
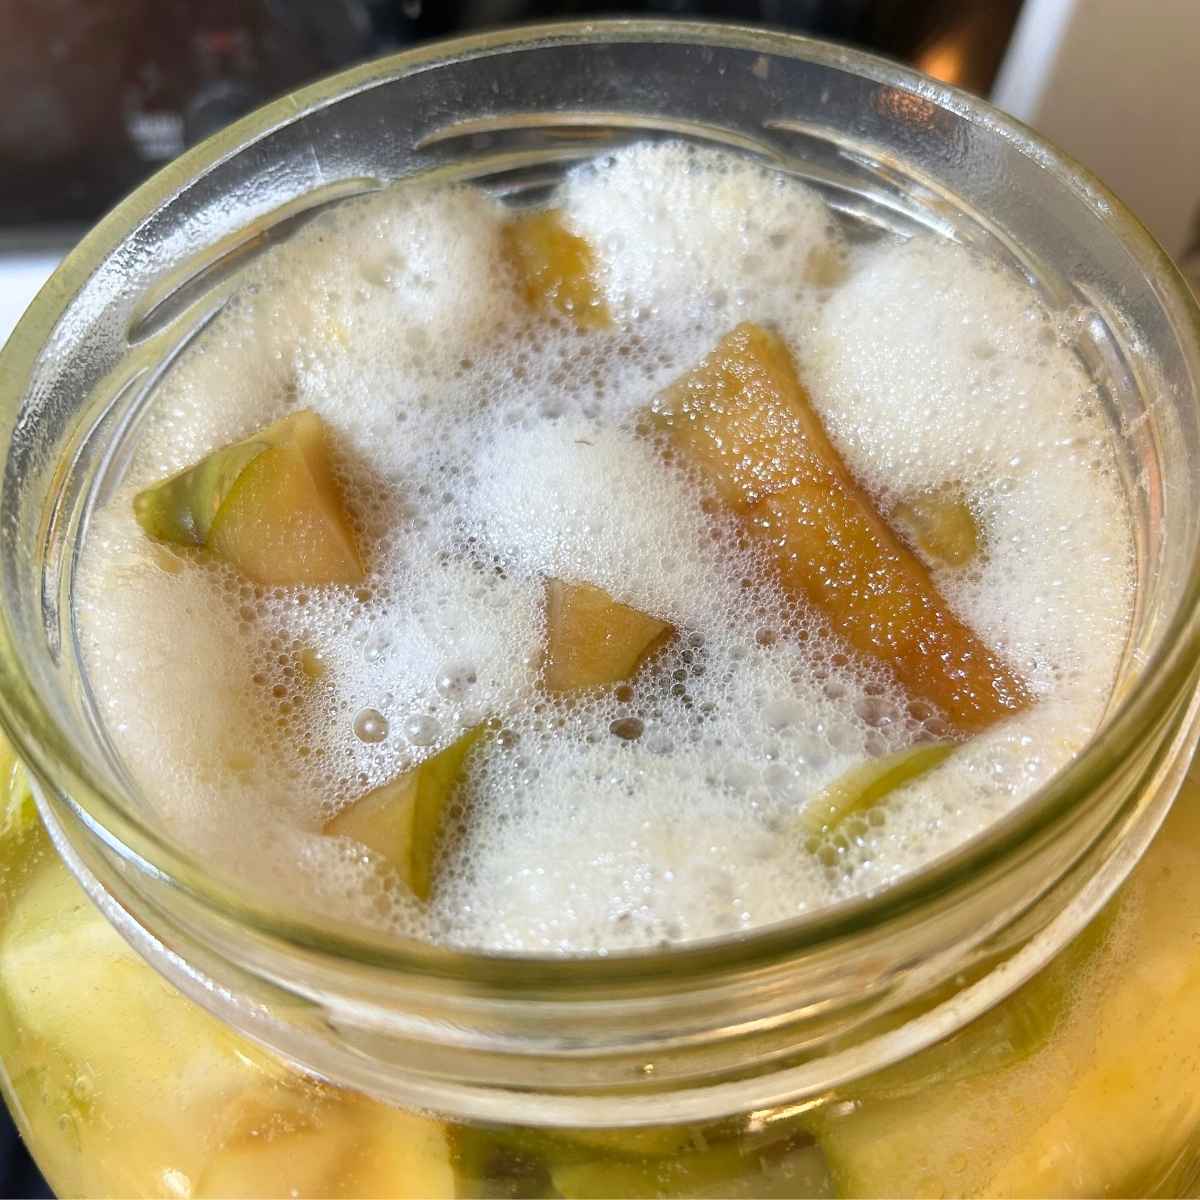
- Observe and Stir: For the first 7-10 days, gently stir the mixture once a day with a clean, non-metallic spoon. This helps distribute the yeasts and prevents mold from forming on exposed scraps. You'll start to see small bubbles forming – a sign that fermentation is underway!
- Strain the Scraps: After about 1-2 weeks (or once bubbling significantly slows down), strain the liquid through a fine-mesh sieve into another clean glass jar. Discard the spent apple scraps.
- Second Fermentation: Cover the jar of liquid again with your breathable cover. Return it to your warm, dark spot for another 2-4 weeks. During this phase, the acetic acid bacteria will continue to convert the alcohol into vinegar. You'll likely see a "mother of vinegar" start to form, a cloudy film or gelatinous disc. This is a good sign!
- Taste and Bottle: After a few weeks, begin to taste your vinegar periodically. When it reaches a pleasant acidity and sourness to your liking, it's ready! Remove the mother (if desired – you can save it for future batches), and transfer the finished apple scrap vinegar to airtight bottles or jars.
Essential Tips for Fermentation Success
Homemade ferments can be incredibly forgiving, but a few key practices will dramatically increase your success rate and prevent common pitfalls:
*
Sanitation is Key: While we rely on beneficial bacteria, we want to prevent *unwanted* bacteria or mold. Always start with thoroughly cleaned (and ideally sanitized) jars, lids, and utensils.
*
Avoid Chlorinated Water: Chlorine is a disinfectant designed to kill microbes – including the beneficial ones you need for fermentation. If your tap water is chlorinated, either use filtered water or pour your tap water into an open pitcher and let it sit uncovered on your counter overnight. The chlorine will off-gas, making it safe to use.
*
No Metal Contact: Metal can react with the acidic environment of fermenting vinegar, potentially leaching undesirable flavors or even toxic compounds into your product. Stick to glass, ceramic, or food-grade plastic for all containers and stirring utensils.
*
Don't Skimp on Sugar: While it might seem counterintuitive to add sugar to vinegar, remember it's the *food* for your yeast and bacteria. Without sufficient sugar, the fermentation process won't properly convert to vinegar.
*
Patience is a Virtue: Fermentation takes time. Don't rush the process. If your vinegar isn't sour enough, give it another week or two. The ideal temperature and ambient yeast activity will dictate the exact timeline.
*
Know Your Molds: A thin, white, opaque film on the surface is likely Kahm yeast, which is generally harmless. However, any fuzzy, colorful, or dark growth (green, black, pink) is mold and means your batch should be discarded. When in doubt, throw it out. For more in-depth fermentation secrets and troubleshooting, read our guide on
Homemade Apple Vinegar: Fermentation Secrets & Uses.
Maximizing Your Homemade Apple Scrap Vinegar
Now that you've successfully created your own apple scrap vinegar, what can you do with it? Its versatility is truly impressive!
Common Uses:
- Culinary Delight: Perfect for salad dressings, marinades, deglazing pans, or adding a zesty kick to sauces. It also shines in quick pickles (not for long-term canning, remember!) and homemade condiments.
- Natural Cleaner: Mix with water for an all-purpose household cleaner. It's excellent for cutting grease, shining surfaces, and tackling hard water stains. You can even infuse it with citrus peels or herbs for a pleasant scent.
- Beauty & Personal Care: Diluted apple scrap vinegar makes a fantastic hair rinse to restore shine and balance scalp pH. It can also be used as a natural, diluted skin toner.
- Garden Aid: A diluted spray can help deter pests and act as a natural weed killer for troublesome areas (use with caution, as it's non-selective).
- Animal Care: Some homesteaders use diluted apple scrap vinegar in animal drinking water (e.g., chickens, dogs) as a natural health tonic, believed to support digestion and overall wellness. Always research and consult with a vet before administering to pets.
Storage:
Once bottled, store your apple scrap vinegar in a cool, dark place. It will keep for many months, if not indefinitely. You might notice a new "mother" forming over time or sediment at the bottom – this is completely normal and indicates a live, active product.
Conclusion
Making apple scrap vinegar is more than just a recipe; it's a step towards self-sufficiency, sustainability, and embracing the satisfying rhythm of homemade living. It transforms humble kitchen scraps into a powerful, multi-purpose product that saves you money and reduces waste. While it's distinct from traditional apple cider vinegar, its ease of creation and wide array of uses make it an invaluable addition to any home. So, next time you're peeling apples, don't toss those scraps! Instead, embark on this simple fermentation adventure and discover the impressive potential hidden within your kitchen waste. You'll be amazed at the delicious and practical results.